Welcome to the first edition of “Inside the kitchen with Gina” – I just came up with that, I might change it, I don’t know….AnyWHEY….Did you know we use our very own yogurt for several of our baked goods? Now you know! And I’m about to tell you how you can make yogurt at home.
You’re going to need these supplies if you don’t already have them:
Disclosure – As an Amazon Associate I earn from qualifying purchases. This page contains affiliate links. If you choose to purchase after clicking a link, I may receive a commission at no extra cost to you.
Instant Pot with Yogurt Function – this is the most foolproof way, and you can use the instant pot for SO MANY THINGS! I have two, and I’m not sorry. If you don’t already have one, what have you been waiting for?
Strainer – You can totally use cheesecloth instead, but even though this strainer is a uni-tasker, it’s worth it because it’s easy to clean. And it can go right in the fridge all lidded up.
Silicone Spoon or Spatula – I love these: GIR spoon and GIR Spoonula I have multiple sizes in multiple colors
Instant Read Thermometer – temperature is SUPER important here. You don’t want to kill the good bacteria with heat.
Jars – you can either keep your finished yogurt in a large bowl in the fridge, or portion it out into jars.
Yogurt – you’ll need plain yogurt to start. Skyr, Chobani, etc…. Just plain yogurt with live active cultures to get started. After your 1st successful batch of yogurt, put some in the freezer for the next batch
Optional but helpful: Funnel (wide mouth for mason jars) & ladle to store individual serving sizes in the fridge
recipe
1 half gallon of milk
2 Tbsp plain yogurt with live active cultures or packaged yogurt cultures
directions
Add milk to instant pot insert, close lid
Press “yogurt” function on instant pot and press “adjust” until you see “boil”. (Your model may vary)

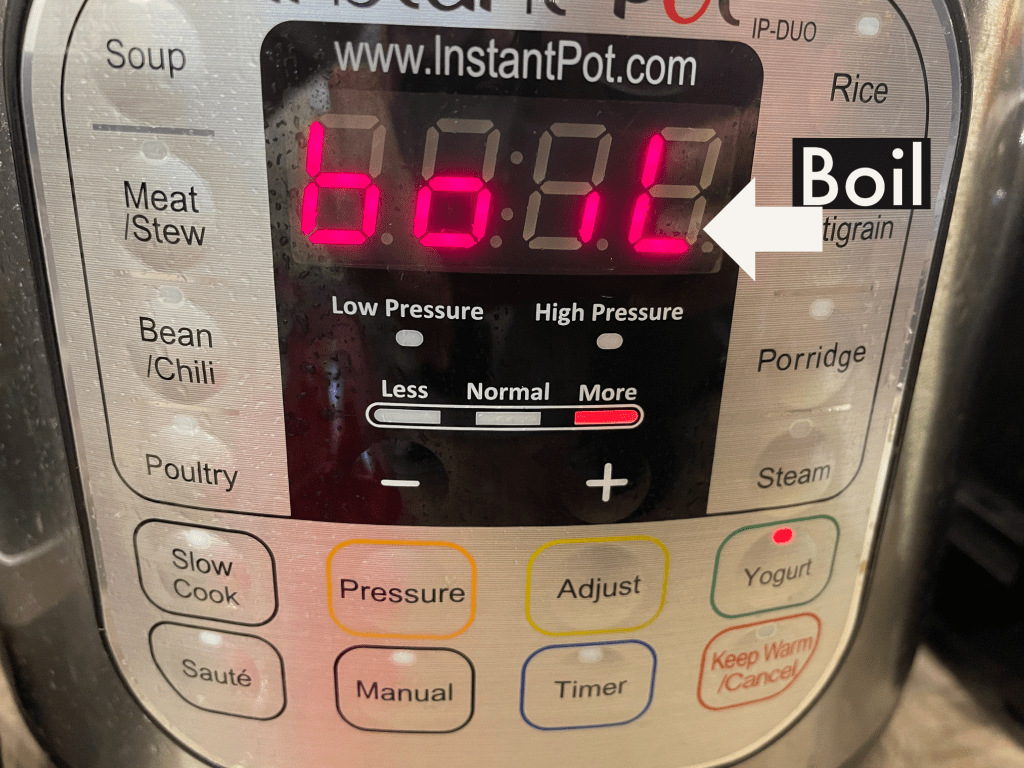
- The Instant Pot will beep, it will start the boiling process, and beep & display “yogt” when done.
- Remove the lid and let the milk cool down to at least 115 degrees.
- Speed the cooling process up by carefully removing the insert and either putting it in an ice water bath or on a rack to increase air flow.
Once the milk is cooled to 115 (or below), plop 2 Tbsp plain yogurt in the pot (no stirring required!).
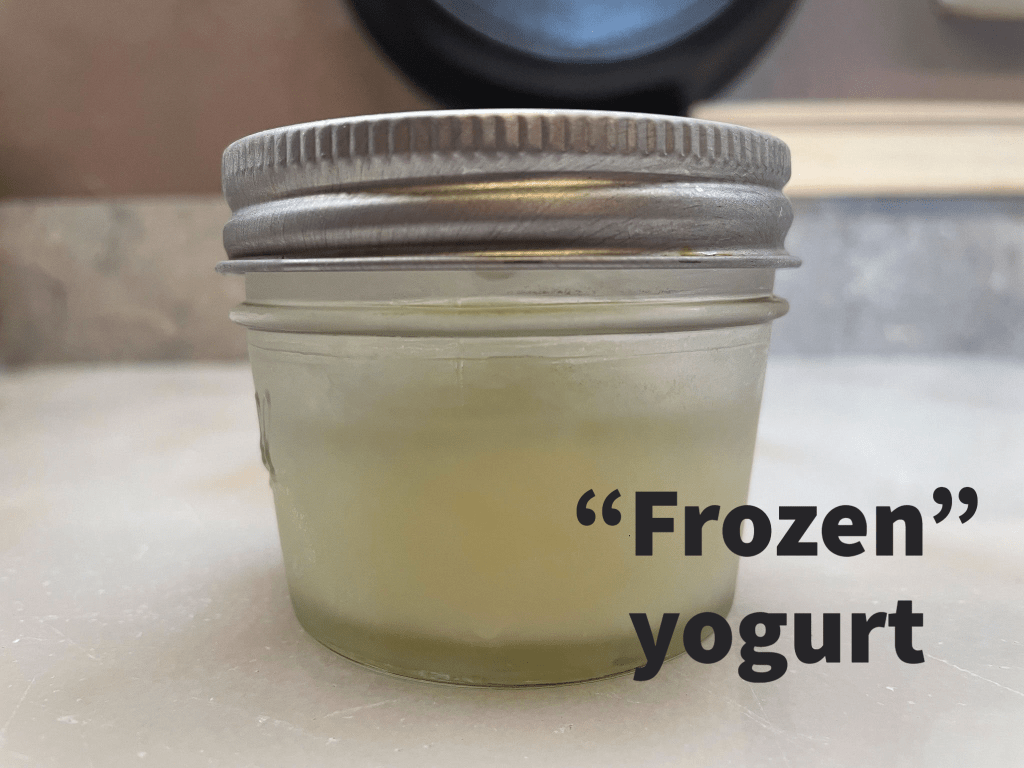
(If you use your own “frozen” yogurt, let thaw at room temp while the milk is cooling)
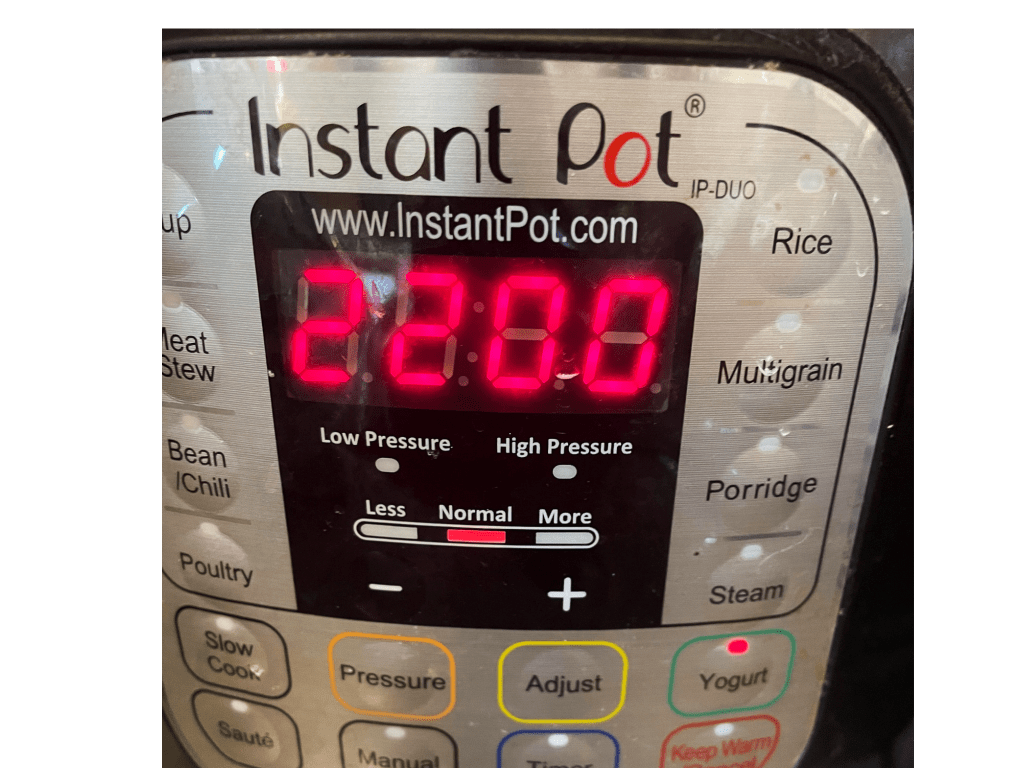
Set the instant pot to “yogurt”, then press ‘adjust’ until you see the time, and set the time to 22 hours. The longer you let it incubate, the less lactose will be in the yogurt. Sometimes the yogurt can be ready in 8 hours, but the actual time depends on the yogurt.
Once you’re satisfied with the taste and texture of your yogurt, turn off the instant pot, remove the insert, and use the ladle and funnel to portion-out the yogurt into the mason jars or glass bowl.
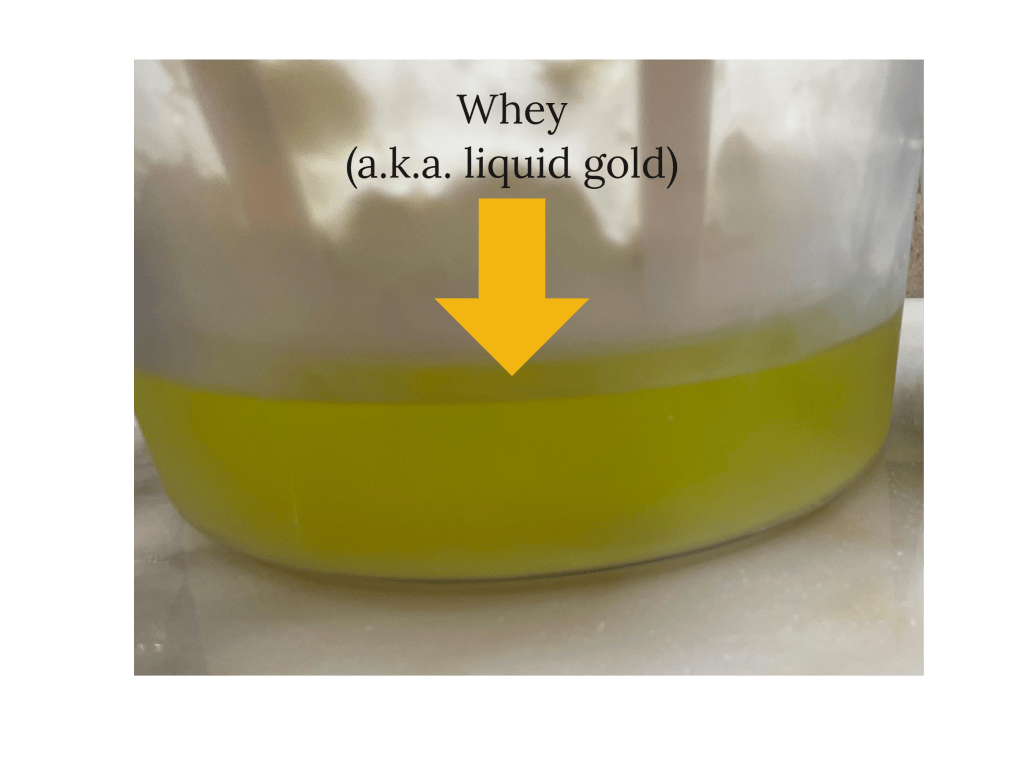
Alternatively, the yogurt can be poured into the strainer (linked above) to make thicker, Greek-style yogurt. You’ll also have plenty of whey left after that process to add to pancakes, waffles, and a whole host of other recipes (Those recipes are coming soon)!
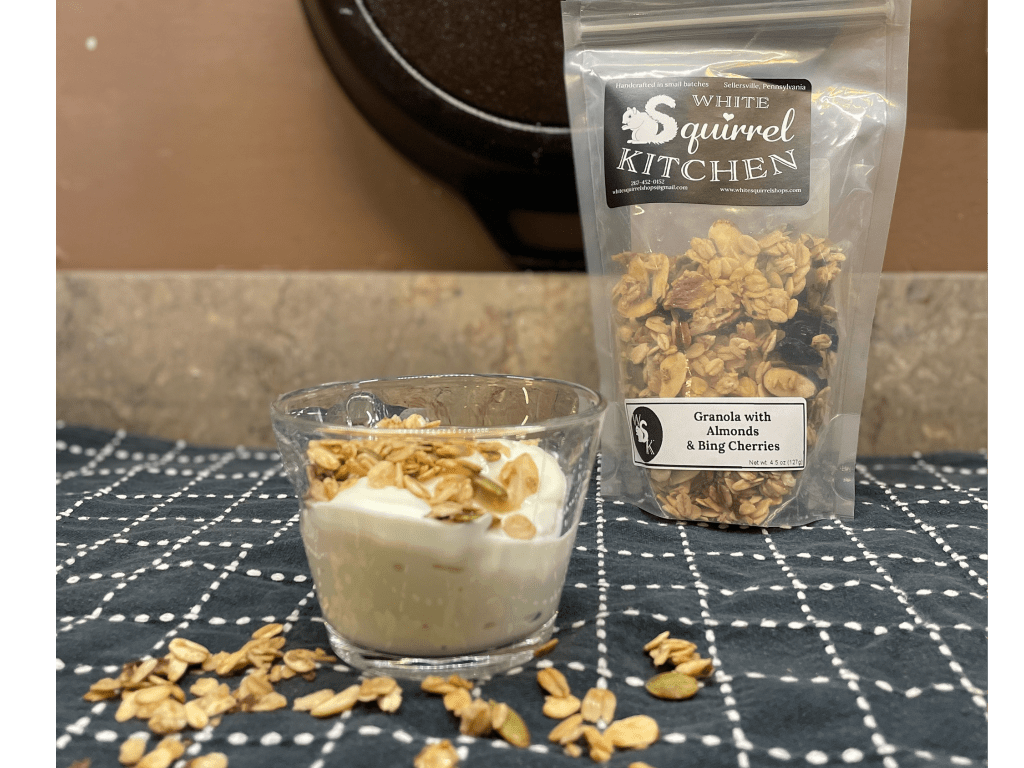
Top your yogurt with fruits, granola (maybe try some White Squirrel Kitchen granola, purchase HERE), pure maple syrup… pick your favorite but it’s also delicious plain!